
Auth
Introduction
SvelteStart uses the Better Auth library for authentication. It supports multiple login options. The app is set up to use email and password authentication as well as social sign-on with Google. However, with a little extra effort, you can add other providers as well.
Better Auth was chosen to avoid the complexity and security risks of rolling your own auth from scratch (see how security is handled in Better Auth). At the same time, you retain ownership of auth flows and data unlike with fully managed solutions such as Clerk and Auth0. Overall, it's a good middle ground: you get the security and structure of a trusted library, but also the flexibility and control of an in-house solution.
How it works
Better Auth runs as middleware within the SvelteKit app, interecepting all requests to /api/auth/* routes via the handler in hooks.server.ts. This allows it handle your auth logic. During initial setup, the CLI generated the necessary database schemas for managing auth. With that schema defined, the Better Auth instance can simply connect to your database. This configuration can be found in src/lib/server/auth.ts.
The auth instance (instantiated in src/lib/server/auth.ts) provides an api object that exposes every Better Auth endpoint that exists. So instead of calling the /api/auth/* endpoints directly via fetch, we can just invoke methods directly e.g. await auth.api.signInEmail(...);. SvelteStart integrates these calls into its authentication flows within form actions.
Better Auth also provides a Svelte-compatible client. This client instance exposes the same API endpoints but it is accessed from the frontend. SvelteStart only uses this for social sign-ons. Handling things server-side is preferred because SvelteStart uses remote functions as the standard way to submit requests which is set up to include validation and error handling.
Rate limiting is an important practice to manage traffic and prevent abuse. Better Auth has been configured to use Redis for it's built-in rate limiting (as well as storing sessions). This limits any client side requests to the /api/auth/* endpoints. Meanwhile, server-side requests (via auth.api) are trusted and are not automatically rate-limited. Instead, SvelteStart implements custom rate limiting (using the sveltekit-rate-limiter library) specific to the kind of action e.g. sign up, login etc.
Better Auth uses traditional cookie-based session management. A session is a way to persist authentication state in the server. After authentication, Better Auth sends the session token back in the HTTP response with a Set-Cookie header. This cookie is then sent to the server on every request. The server then uses getSession to validate the session and returns user and session data if the session is valid. To reduce database load and speed up session checks, Redis is used as a session cache (secondary storage). The session expires after 7 days by default. It is also a rolling session, meaning if the user is actively using the app, then the expiration gets extended. Specifically, if at a given request, it has been at least 1 day (updateAge) since the session was last updated (refreshed), the session will be updated, extending the expiration by 7 days from that point in time. This allows active users to stay logged in.
Set up Social Sign-On
OAuth is a protocol that allows apps to access user data from a provider like Google without exposing their credentials. Here's the basic flow. Clicking on a "Continue with ..." button on the login page will redirect the user to the provider's login page, where they will asked to grant permission for the app to access some profile info like their name and email address. The provider will then redirect the user back to the app (via a predefined callback URL), including an authorisation code in the URL. At this Better Auth route, it exchanges the authorization code with the provider’s API to obtain an access token. This token is then used to grab the user's profile details like name, email and profile image. Then, if this user doesn't already exist in the database, it will create one. If it does exist (e.g. as a email/password account), then it will automatically link the OAuth account to that user. Better Auth handles all this for us. Finally, session logic is applied (discussed later on), allowing the user to remain logged in and access protected pages.
Now that you understand the overall process, we can move on to the setup process with each provider.
Google
To set up Google login, first, create an account with Google Cloud Console, then create a new project for your web app. Next, go to the Credentials page under API & Services. Click "Create credentials" and select "OAuth client ID". Fill in the fields as follows:

Once created, copy the client ID and secret and add them to your .env file. Also add the Google redirect url (http://localhost:5173/api/auth/callback/google) to your .env file.
Then create two more: one for production and one for staging (name them staging and prod, and insert the appropriate URLs). This time, add the client ID, secret, and redirect URL to your production and staging environments. Also, make sure that the PUBLIC_FRONTEND_URL environment variable is set to the correct domains in both environments.
Note that it may take a couple of hours for these changes to take effect.
Github
To set up Github login, go to Github developer settings and add a new OAuth app. Fill in the fields as follows, uploading your app icon as well:
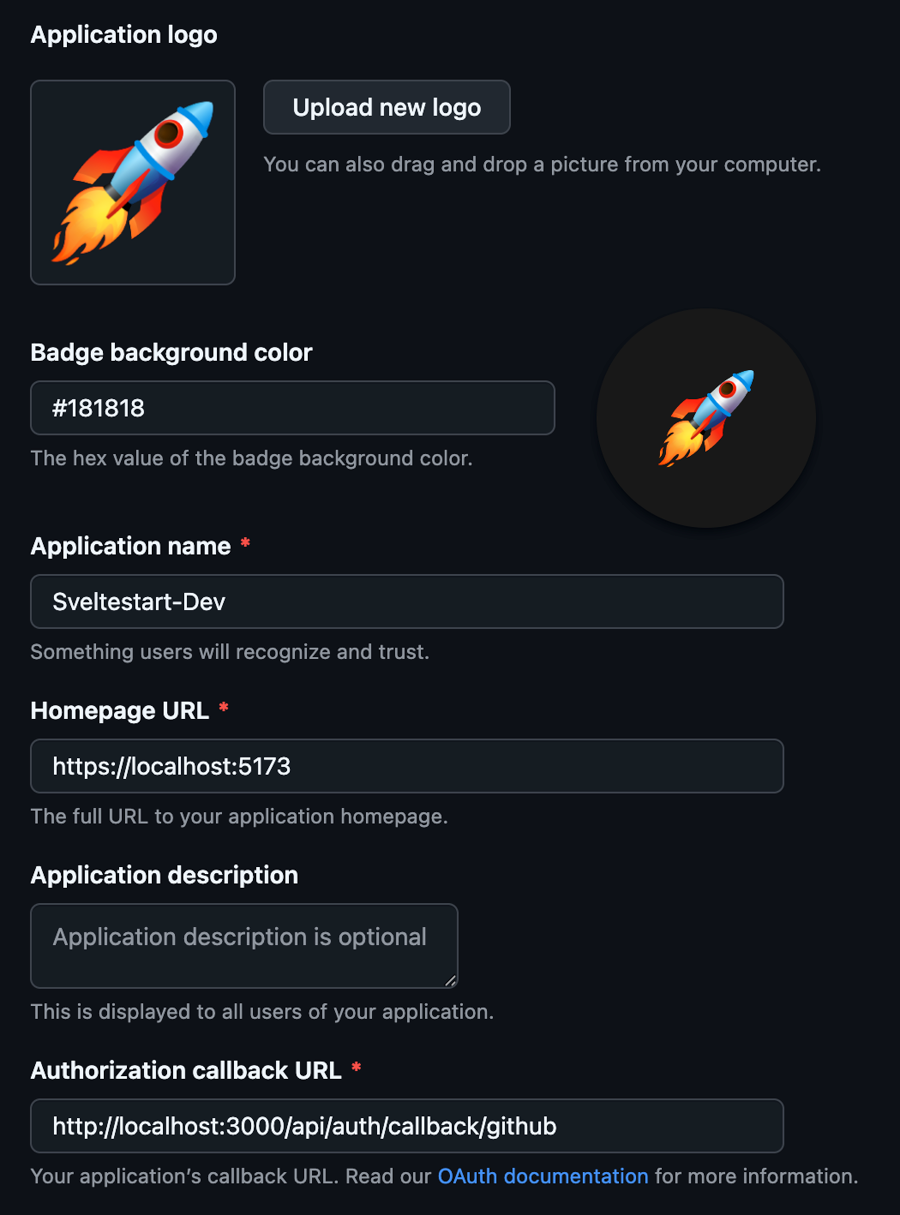
Then generate a client secret, and copy and paste this into your .env file. In addition, copy and paste the client ID.
Then repeat these steps for staging and production. This time, add the client ID and secret to the environment variables in your Dokploy apps for staging and production. After doing all this, GitHub login should work in all three environments.
Set up Email and Password Authentication
Email and password authentication is the most common way to authenticate users. However, it can be challenging to set up from scratch as there are many security best practices that are easy to miss. Luckily, Better Auth provides functions that can implement all the necessary actions such as sign up, login, email verification and password reset. All we do is pass in the form data to the backend and make those calls.
Here's the basic flow that's mostly taken care of by Better Auth. When a user signs up, they provide their email and a password. These fields are validated. Then the server hashes the password using a secure algorithm and saves the fields to the database. Finally, the user is sent an email with a link to verify their email before they can enter the app. When a user logs in, they provide their email and password. The user is looked up in the database and the provided hashed password is compared with the stored hashed password. If they match, session logic is applied (discussed later on), allowing the user to remain logged in and access protected pages.
Almost of all this has already been set up in SvelteStart with the help of Better Auth. What's left for you to do is set up transactional emails and Cloudflare Turnstile for bot protection.
Transactional Emails for Auth
There are two email use-cases related to auth. The first is for account verification upon signup to confirm that the user's email address is real. The second is for password resets either through a 'Forgot password' form or a manual reset request inside the Profile page.
Better Auth exposes functions like sendVerificationEmail and sendResetPassword that are called automatically where appropriate. They are defined in the auth.ts config. This is where the email sending logic lives. Note that if you are using a transactional email provider other than ZeptoMail, then you'll need to modify the existing logic there to suit that provider's API.
To get started, you'll first need to set up the transactional email provider. Go to the Email guide and complete the 'Setting up Transactional Emails' section. Then, you can continue here to learn how to send emails for auth flows.
We need to use nicely-styled templates for emails and store them in ZeptoMail. You can find our custom templates at src/lib/server/email-templates. You'll notice that the templates are .mjml files not .html. MJML is a markup language that's designed specifically for writing responsive HTML emails easily and reliably. Most email clients do not have support for modern CSS so developers typically have to use outdated table based layouts for compatibility. MJML gives you a set of intuitive components that will compile to this widely-compatible table-based HTML. Note that if you want to create your own templates but don't want to learn the MJML syntax, an LLM can help generate these templates.
Let's first start with the verify.mjml template. Update the src attribute in the mj-image tag to your app's logo URL. Then convert the MJML to HTML via the MJML online editor. Navigate back to your mail agent in ZeptoMail and go to the 'Templates' tab. Add a new blank template and fill in the name and subject fields. Then click on the code icon button to insert HTML. Copy and paste the HTML from the MJML editor into the code field.
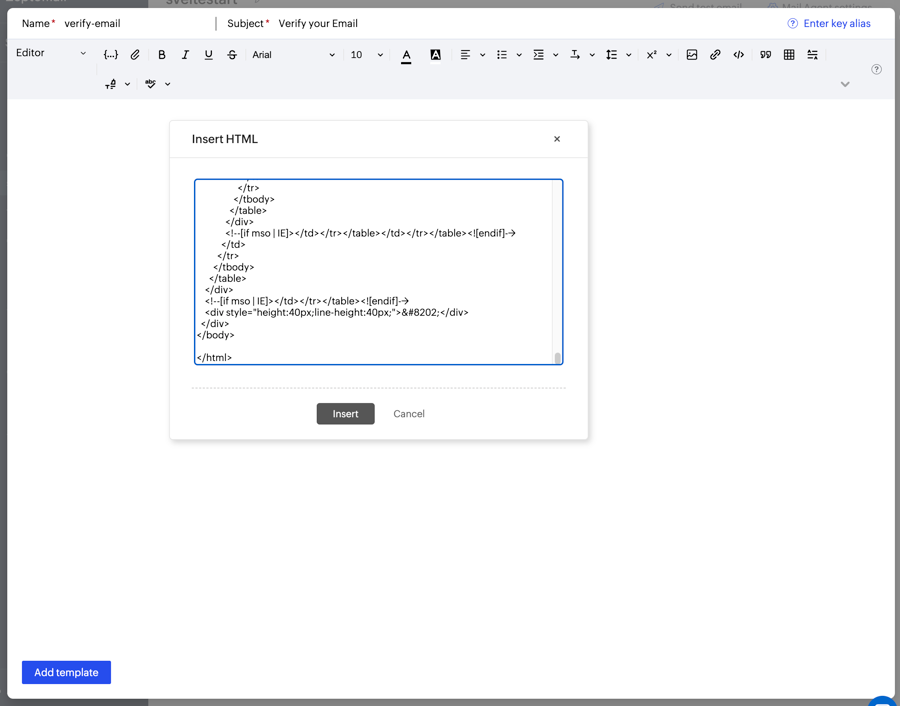
Click 'Insert' and you should see the preview of the email.

Once you've added this template, copy the key and paste it in src/lib/server/email-verification.ts in the constant VERIFICATION_TEMPLATE_KEY.
Now repeat with the reset-password.mjml template.
Then go to src/lib/server/email.ts and edit BOUNCE_ADDRESS to bounce@bounce-zem.your-domain.com and FROM_ADDRESS to support@your-domain.com. Substitute the your-domain part with the app's actual domain.
Cloudflare Turnstile
Cloudflare Turnstile is a free verification tool that confirms users are real and blocks unwanted bots without compromising on user experience. Traditional CAPTCHAs such as Google's reCAPTCHA slow down users by forcing them to complete challenges. Turnstile uses modern, passive bot-detection techniques such as IP address and reputation, browser fingerprint and behaviour signals. It only resorts to challenges upon suspicion of a bot. Another benefit is that unlike Google, it does not harvest user data that could be used for advertising purposes.
A turnstile widget has been added to login, signup and forgot password pages. You will need to create a Cloudflare account and add a new Turnstile widget. You can name it the same as your app. Add 127.0.0.1 (localhost) as a hostname for it to work locally. Also, add your production domain as a hostname. Then copy the Site Key and Secret Key. Paste these into your .env file.
And that's it! Now email and password authentication should work. Go ahead and try out the following: signup, login, forgot password, and reset password (inside Profile page).
Note that Better Auth actually provides a CAPTCHA plugin that supports Cloudflare Turnstile validation out of the box. However, Sveletestart manually implements this validation since the plugin does not work server-side with auth.api. It only works with authClient which we have opted not to use for email and password authentication as explained earlier. With that said, we have still enabled this plugin (in auth.ts) as it will protect sensitive Better Auth endpoints such as /api/auth/sign-up/email, /api/auth/sign-in/email and /api/auth/request-password-reset. With these public endpoints protected, bots cannot abuse the API.
Protect Pages and Routes
When creating a new page that needs to be protected, you need to manually call the
protectPage()function at the start of that page's load function to enforce the session check.Similarly, if you want to protect a remote function, manually call
protectRemote()at the start of that function to enforce the session check.Also, if you want to protect an API route, manually call
protectApi()at the start of that function to enforce the session check. However, it's better to use remote functions where possible.
Last updated