
Billing
Billing
Setting up a Stripe account
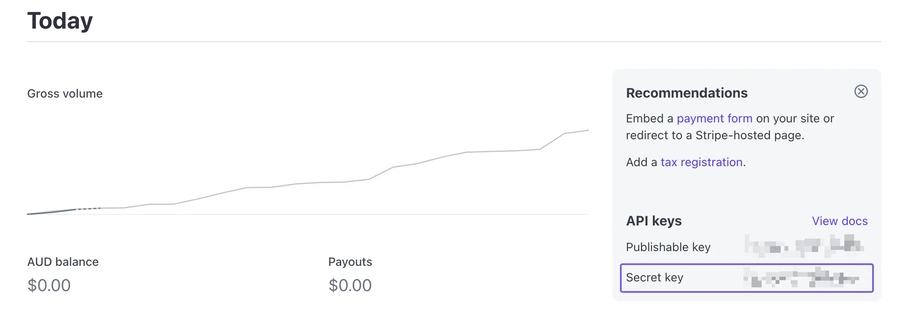
SvelteStart uses Stripe for billing. First, sign up with Stripe and then set up a new app account inside. Then grab the secret API key from the Test Mode Dashboard (starting with sk_test_...), and store it in your .env file as well as the staging environment. You should also store this as an environment variable in staging environment in Vercel.
Next, go to the 'Product catalogue' page and create products in Stripe e.g. 'Basic Plan' and 'Premium Plan'. Each product should have a monthly price and potentially a yearly price. However, note that a yearly price setup is not yet implemented in SvelteStart.

For production, you'll want to set up live mode in your Stripe account. This will require a photo ID verification process that should take a few minutes. Then, grab the secret API key (starting with sk_live_...) and add it to the environment variables in your production environment (e.g. Vercel).
Also, the products you created earlier won't automatically copy over to live mode. You'll want to recreate them. This can be done quickly by going back to test mode, and clicking 'Copy to live mode' for each product.

Setting up the Webhook
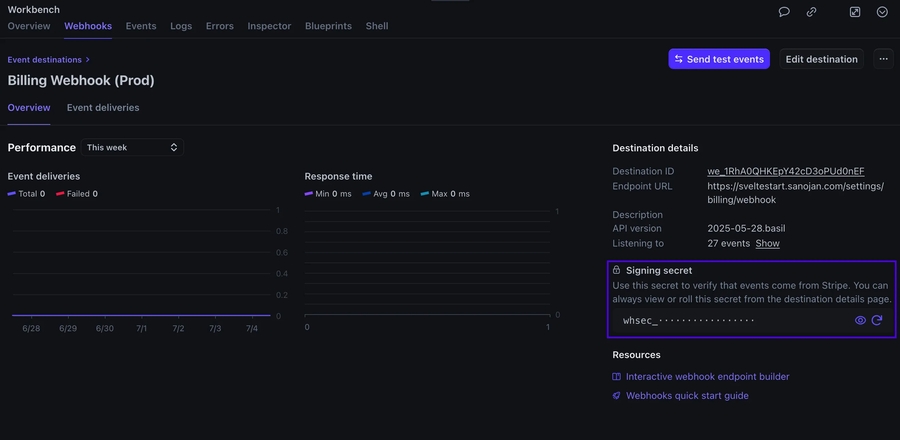
Stripe's webhook is a way to send our server real-time notifications about events that typically happen outside of our direct control e.g. payment success/failure and plan changes. The webhook endpoint in our app is at /settings/billing/webhook.
For local development, first install the Stripe CLI, and login. Then run stripe listen --forward-to localhost:5173/settings/billing/webhook in a separate termial window. This will forward webhook events from Stripe to your local development environment. The initial output of the command will spit out a webhook signing secret starting with whsec_... that you will need to add to your .env file. This secret will be used by the app to verify that incoming webhook requests to your app are genuinely from Stripe. You should keep this command running in the background while you work locally. Note that the secret will be the same if you re-run the command so you don't have to worry about updating your envrionment variable each time.
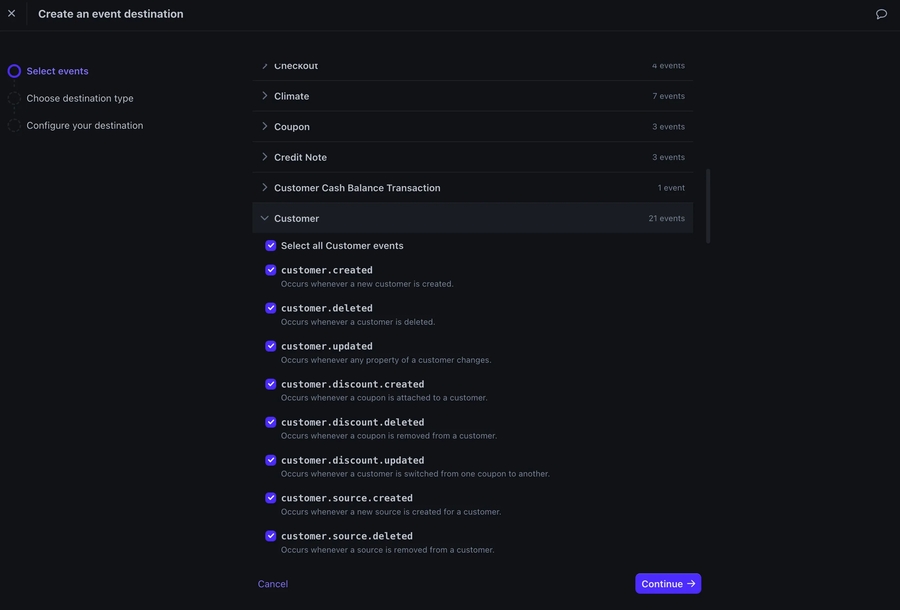
For production, you will need to add your webhook endpoint to Live Mode Dashboard. Make sure you've set up live mode in your Stripe account beforehand. Now let's go through the process of creating an event destination. First, select all 'Customer' events, then hit 'Continue'.
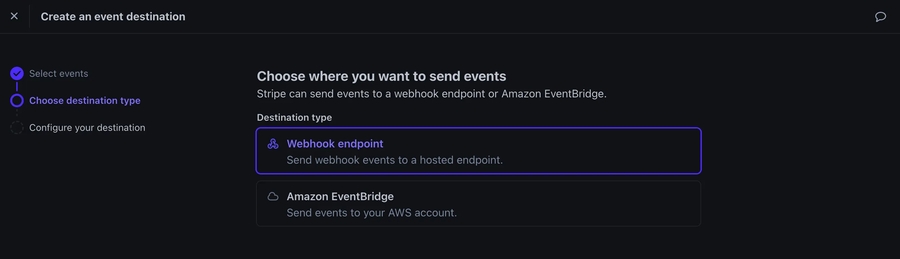
Then, ensure that Webhook endpoint is selected and hit 'Continue'.
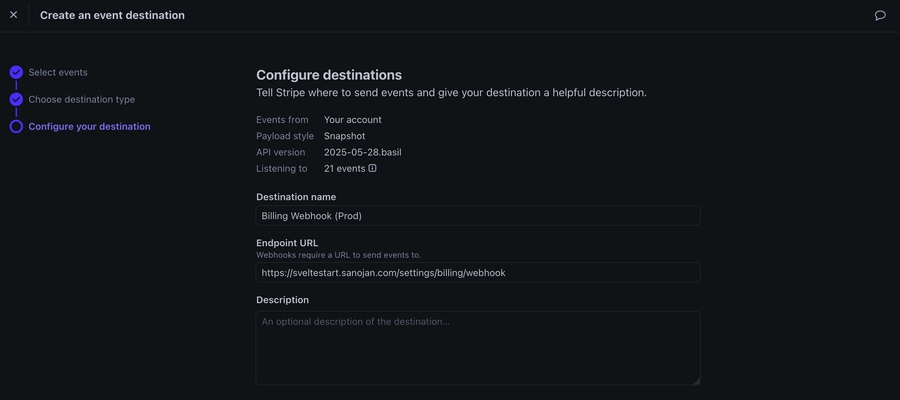
Finally, enter a name and endpoint url which is your domain followed by /settings/billing/webhook. Then hit 'Create destination'.
Now that the webhook is set up, you need to add the secret to the environment variables in your enviornment (e.g. Vercel), and redeploy.
And voilà! You're all set up to receive webhook events from Stripe.
Fill in Business Details in Stripe
Customers will see certain details about your business in their invoices so you want this to be accurate. Go to the Business Details and fill in the 'Public details'. The details should be scoped to your app, not your overall Stripe account. Be sure to include details regarding support, privacy policy and terms of service pages. In particular, 'Business name' is important as it will be displayed in the Customer Billing Portal page discussed in the next section.

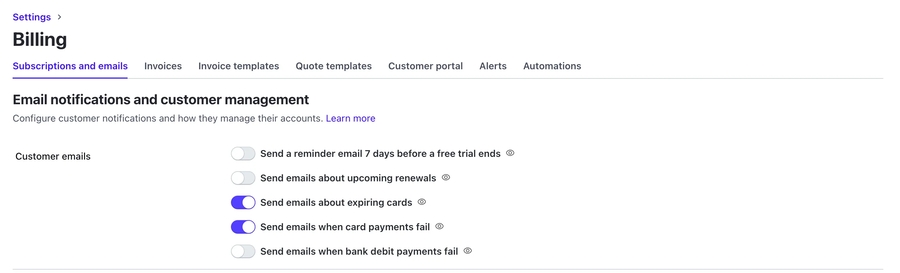
While we're here, go to Billing Settings and enable 'Send emails about expiring cards' and 'Send emails when card payments fail', then hit 'Save'.
Setting up the Customer Billing Portal
The customer billing portal is a Stripe-hosted page where a customer can manage their payment e.g. change their card, and see their invoice history. They can can get to this page by clicking the 'Manage billing' button on the billing page.
You can customise the portal via the Test Mode Billing Portal. First, activate the portal link. Then, I recommend turning off 'Customer Information' so that the app remains the single source of truth for user identity. Also turn off 'Subscriptions' to ensure that the only the app has full control of plan changes for simplicity. You can also add a portal header like the one seen below. You'll also want to repeat this process for Live Mode Billing Portal.

Updating Billing Code
We need to update the plans that will be displayed to the users from the default ones in SvelteStart. There will always be a free plan so you must never change that (unless you're willing to do a lot of extra work). However, if your paid plans deviate from the default basic and premium that SvelteStart was originally set up with, we can make this work with some small changes to the code. For example, you may only have a single paid plan called pro.
First, let's update the frontend at /src/routes/(app)/settings/billing/+page.svelte. Modify the plans list with your plan names and corresponding features. Also update thePLAN_ORDER list with your plan names from least to most expensive.
Now, let's update the database schema to support that. In src/lib/server/auth.ts, change the plan names in planEnum. It's important that you order this from least to most expensive as this order will be used to determine upgrade/downgrade logic. Next, in /src/lib/server/stripe.ts, update the PRICE_IDS to the ones found in your Stripe products.
And that's it! Billing has now been set up! 🎉
Explaining the Overall Flow
Now that you've set up billing, let's go through what's actually happening to get a better understanding. To start with, we will assume that there is a free plan, and two paid plans: basic and premium, which get more expensive in that order. On the billing page, when the user clicks on one of the plan's buttons, a checkout form action is sent to the backend indicating the plan they picked e.g. basic. The backend also retrieves the current plan from the users table in the database.
Once the backend has the current plan and the user's selected plan, it can determine what kind of transition needs to made as seen in the diagram below:
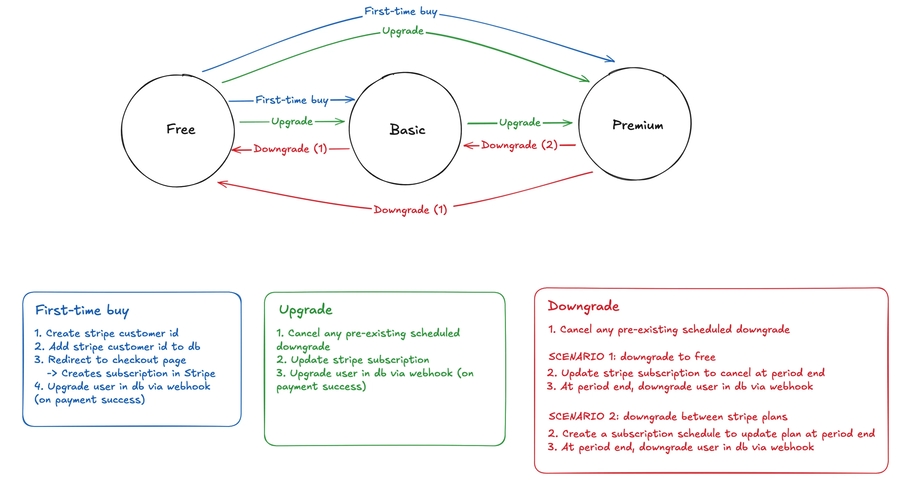
Let's say the user is purchasing a plan from the app for the first time. First, we create a Stripe Customer ID via the Stripe API, and store this in our database (useful in the future when we need to retrieve their info for an upgrade/downgrade). Then, we redirect the user to a Stripe-hosted checkout session. Once they complete the checkout process, Stripe will create a subscription for them, and send out an event to our webhook endpoint. This event is captured, and we can then update the plan value in our database. We also store the Stripe Subscription ID in our database for easy access in the future.
If the user is not a first-time buyer, we know this as they will have a Stripe Customer ID stored in our database. We then attempt to retrieve their Stripe Subscription ID from our database. If this is not found in our database, that means they do not have an active subscription with us so they need to be redirected to Stripe's checkout session as if they were a first-timer buyer.
If the user has a Stripe Subscription ID stored in our database, we can then use this to grab their subscription info via the Stripe API. At this point, we know that they are either upgrading or downgrading. Either way, we first need to cancel any pre-existing scheduled downgrades (will make more sense later). Then, by comparing the current plan and the selected plan, we can determine whether its a upgrade or downgrade.
Upgrades are simple. They happen immediately. We simply update the Stripe subscription via the API. The customer is immediately charged a prorated amount for the remainder of the billing period. Then, their plan value is updated in our database so they can get access to the new plan's features.
Downgrades are a bit more complex. If a user downgrades, they should still retain access to their current plan until the end of the billing period because they have already paid for it. Technically, if proration is enabled here, it could mean that the downgrade takes effect immediately and the user receives a partial refund/credit for the unused portion of their current plan. However, this can be quite confusing for the user from a billing perspective. Instead, SvelteStart will not refund the user and only make the downgrade official at the end of the billing period, continuing to give the user access until then.
In terms of implementation details, there are two downgrade scenarios. The first is if the user is downgrading to free. In this case, Stripe exposes a cancel_at_period_end boolean that can be set to true when updating a subscription. This will cancel the subscription at the end of the month. The second scenario is if the user is downgrading to a paid plan. In this case, Stripe does not consider it a "cancellation" and so the first method won't work. Instead, we schedule a downgrade via Stripe's Subscription Schedule API. In either scenario, Stripe will automatically make the transition at the end of the billing period and then send that event to the webhook endpoint. Here, we can officially update the plan value in the database, so their access will now change throughout the app.
Lastly, if the user fails to make their payment on time or their card fails etc., Stripe will attempt to retry over the coming weeks. However, after a certain number of retries (can be customised in Billing Settings), it will automatically cancel the subscription. This cancellation event is sent to our webhook endpoint, where it is captured and handled i.e. plan is updated to free (and the Stripe Subscription ID is removed from the database).
Last updated