
Database
Set up the development database
SvelteStart uses a PostgreSQL database and uses Drizzle ORM for type-safe SQL queries, schema management, and database migrations. In development, you run a local Postgres instance while in staging and production, the databases are deployed to your VPS.
Let's start with local setup. The docker-compose.yml file in the root of the project defines a Postgres database service. Go inside and edit the POSTGRES_DB value to the name of your app. Then, by running docker-compose up -d (while Docker Destop is running), it will quickly spin up a local database environment for development.
Next, go to your .env file and set the DATABASE_URL value to postgresql://admin:admin@localhost:5432/{POSTGRES_DB}.
Before you can run the app, you'll need to push the existing database schema to the Postgres instance. To do this, run npx drizzle-kit push. And that it's it! Once you set up auth, you'll be able to fully explore the app.
You might also find it helpful to use a GUI database management tool that lets you intuitively explore and edit the database. For local development, you can run npx drizzle-kit studio, which will look at your database url in drizzle.config.ts and then connect to it. You can then browse and edit the database via Drizzle Studio's intuitive web interface.
Migrate the database
Whenever you make an update to the schema (inside lib/server/db/schema folder), you'll need to update the actual database to match. First, run npx drizzle-kit generate to generate SQL migration files. These files contain the necessary SQL commands to update the database structure. Then run npx drizzle-kit migrate to apply the generated SQL migration files to the database.
Note that running the migrate command will make those changes only to the local development database. To update the staging and production databases, we rely on Github Actions. When you push or merge to the staging or main branches, GitHub Actions will automatically apply the migrations to the corresponding database environments. This will be discussed in more detail soon.
Set up the staging and production databases
For staging and production, we will now go through how to deploy separate databases to your VPS. If you wanted, you could also deploy to a platform like Supabase but the free tier will limit the number of databases you can have. Also, since we're hosting the app on our own VPS, the latency for database requests will be very low if you also host our database on the same VPS.
Deploying a database with Dokploy is very easy. Go to your project page and click 'Create Service', then click 'Database'. Then fill in the form as follows (replacing 'sveltestart' with the name of your app):
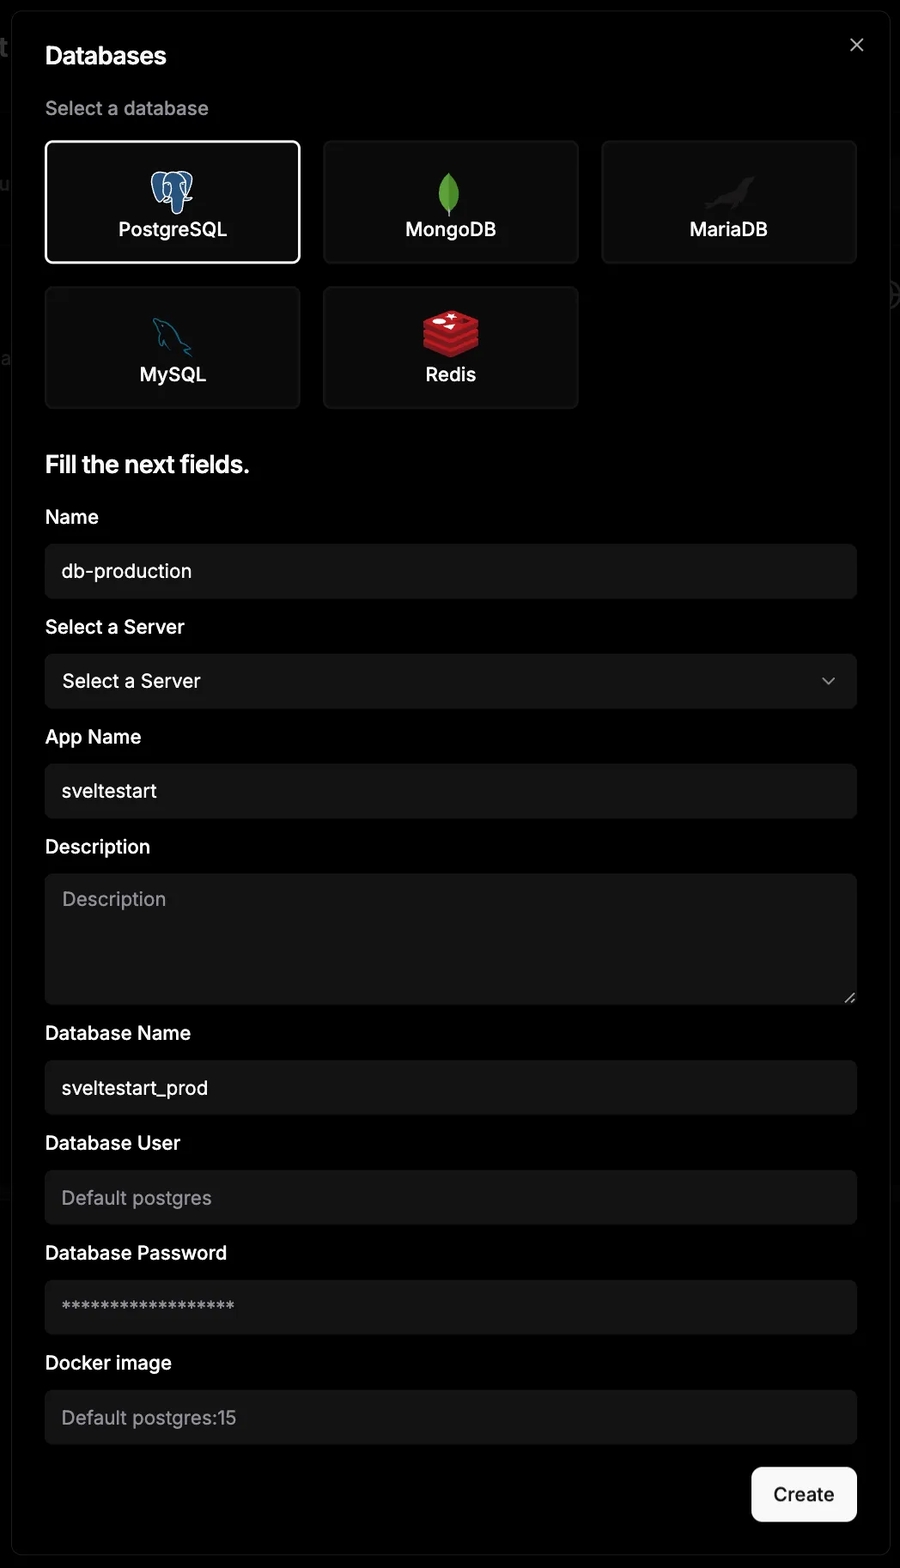
Once created, go ahead and click 'Deploy'. Now to connect to this database to the app, copy the 'Internal Connection URL' and paste in the app's environment variable for DATABASE_URL. With an internal URL, only services inside the same network can connnect to it. While it's possible to create an external connection URL, making the database permanently reachable over the Internet is not good for security.
If you want to use a GUI database management tool to access the remote database, we can temporarily make the database reachable. Set a unique external port number under 'External Credentials'. Now use a tool like Beekeeper Studio to access the database. After downloading and installing Beekeeper Studio on your computer, you can connect to your database using DATABASE_URL. To create a connection, simply click 'Import from URL', paste the URL and it will auto-fill the connection form. Then, you can explore the production database similar to the development one in a user-friendly GUI. After you finish using the tool, remember to unset the external port so that the database is no longer accessible through the Internet.
To set up your staging database, repeat all the above steps but make sure to update names from production to staging where relevant and use a different port number e.g. 61000.
Set up Github Actions for database
The SvelteStart repo comes with Github Actions that will automatically push your migrations to a staging and production database, so let's set these up now. We will first add the staging/production URLs to your Github project's account as secrets.
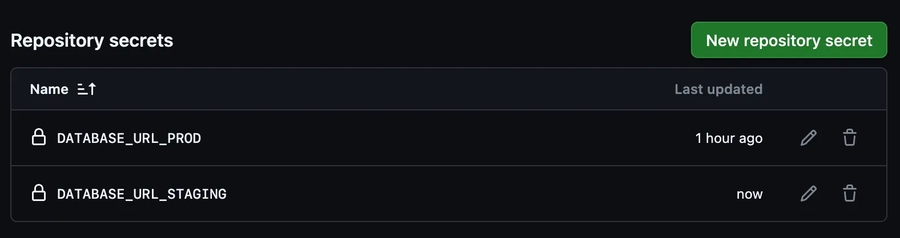
Go to your Github project, click the 'Settings' tab, then 'Secrets and variables', and then 'Actions'. Click 'New repository secret' and add the URIs under the names DATABASE_URL_STAGING and DATABASE_URL_PROD.
These secrets are now available for the GitHub Actions to use. You can find the workflow files at .github/workflows/migrate-staging.yml and .github/workflows/migrate-prod.yml. Whenever you push or merge to the main branch, the production database migrations are applied. Similarly, whenever you push or merge to the staging branch, the staging database migrations are applied.
Set up a Redis store
Redis is an in-memory data store that is often used as cache (also potentially as a database) due to it's blazing-fast sub-millsecond response times. This is because it stores all data in RAM rather than on disk. SvelteStart uses Redis for rate limiting but you can also use it for other features in your app that benefit from caching like frequently accessed data. Storing data in-memory on your Node server (as opposed to Redis) is possible but it only works for that one instance (so you'll face challenges in horizontal scaling), it has no persistence and it's harder to monitor.
Let's get started with a local Redis instance. The same docker-compose.yml file that we used earlier for the Postgres database also includes a Redis service. So if you haven't run docker-compose up -d already, run that now and the container should be up. Then copy and paste REDIS_URL=redis://localhost:6379 inside your .env file. And that's it! Now your app should be storing rate-limited data (and potentially more later, if you'd like) in Redis.
Now let's move on to setting up staging and production Redis instances. This is once again made simple with Dokploy. Go to your project, then create a new database service, selecting Redis. Fill in the form as follows:
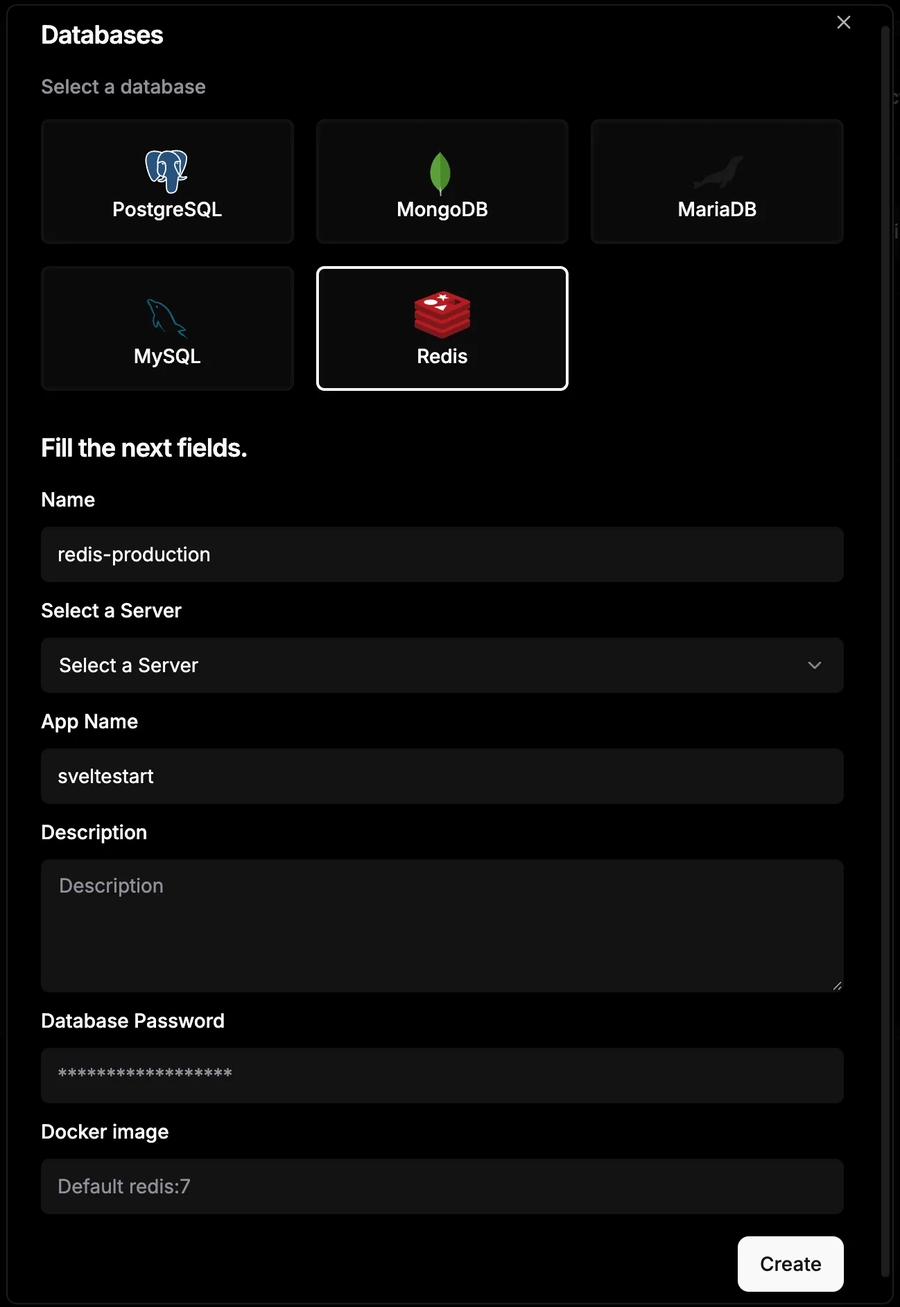
Once created, go ahead and click 'Deploy'. Now to connect to this Redis store to the app, copy the 'Internal Connection URL' and paste in the app's environment variable for REDIS_URL.
For a GUI Redis management tool, the official Redis Insight is a great option. Once installed, you can use it to connect to your local or remote Redis instance to explore keys and monitor performance. Remember that you will need to make the redis store temporarily public before you can connect to it from your local machine.
To set up your staging database, repeat the above steps but make sure to update names from production to staging where relevant and use a different port number e.g. 61500.
Back up your database
It's good practice to automate backups for your production Postgres database. Dokploy makes this easy as long as you provide an S3 destination for storing the backups. I recommend using Backblaze as your cloud storage provider as it is very cost-effective, performant and has free egress (for up to 3x storage). We'll also use this later for saving user files such as their avatar (discussed in a later guide).
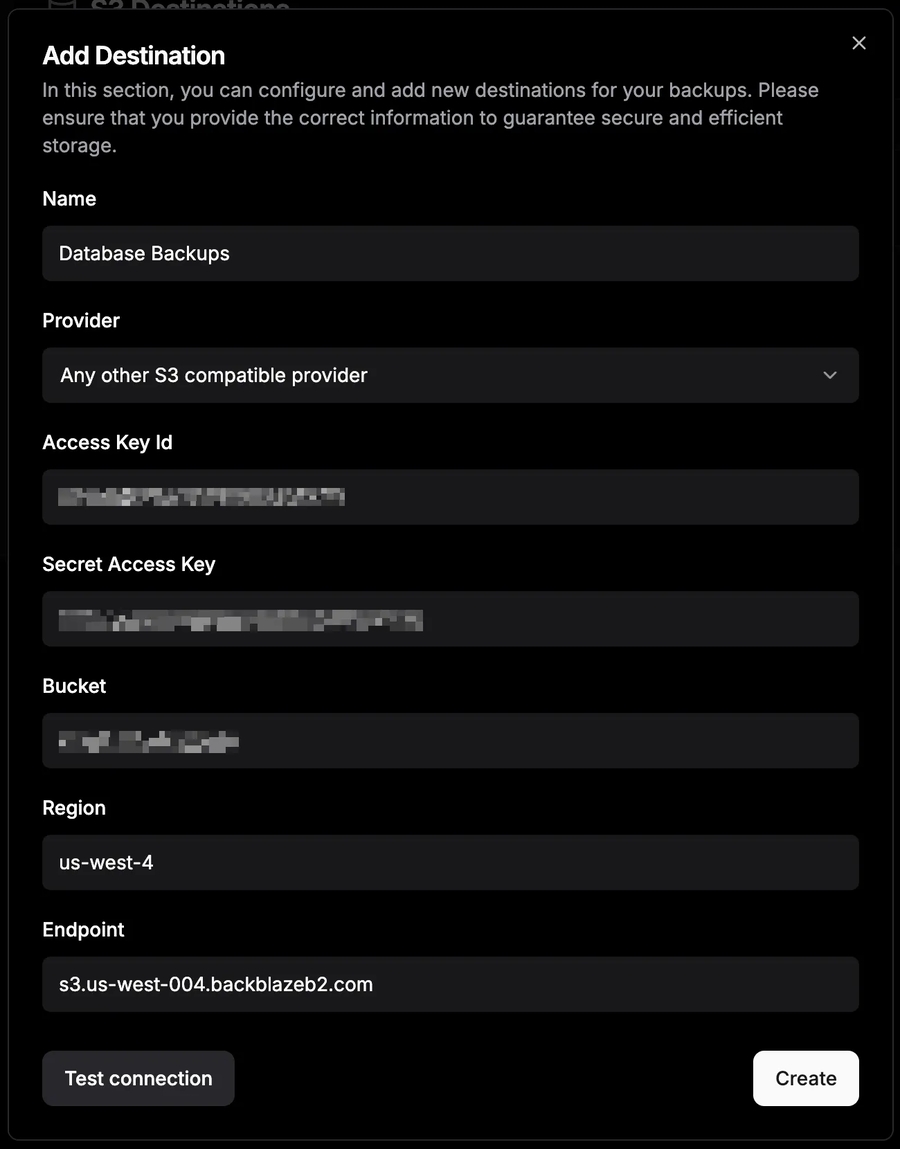
Once you have created an account with your cloud storage provider, create a new bucket with a unique name e.g. 'unique-name-db-backups'. You can use this bucket for all your apps. Create a key for this bucket with read and write access. Then go to the 'S3 Destinations' page in Dokploy and add the bucket as a destination.
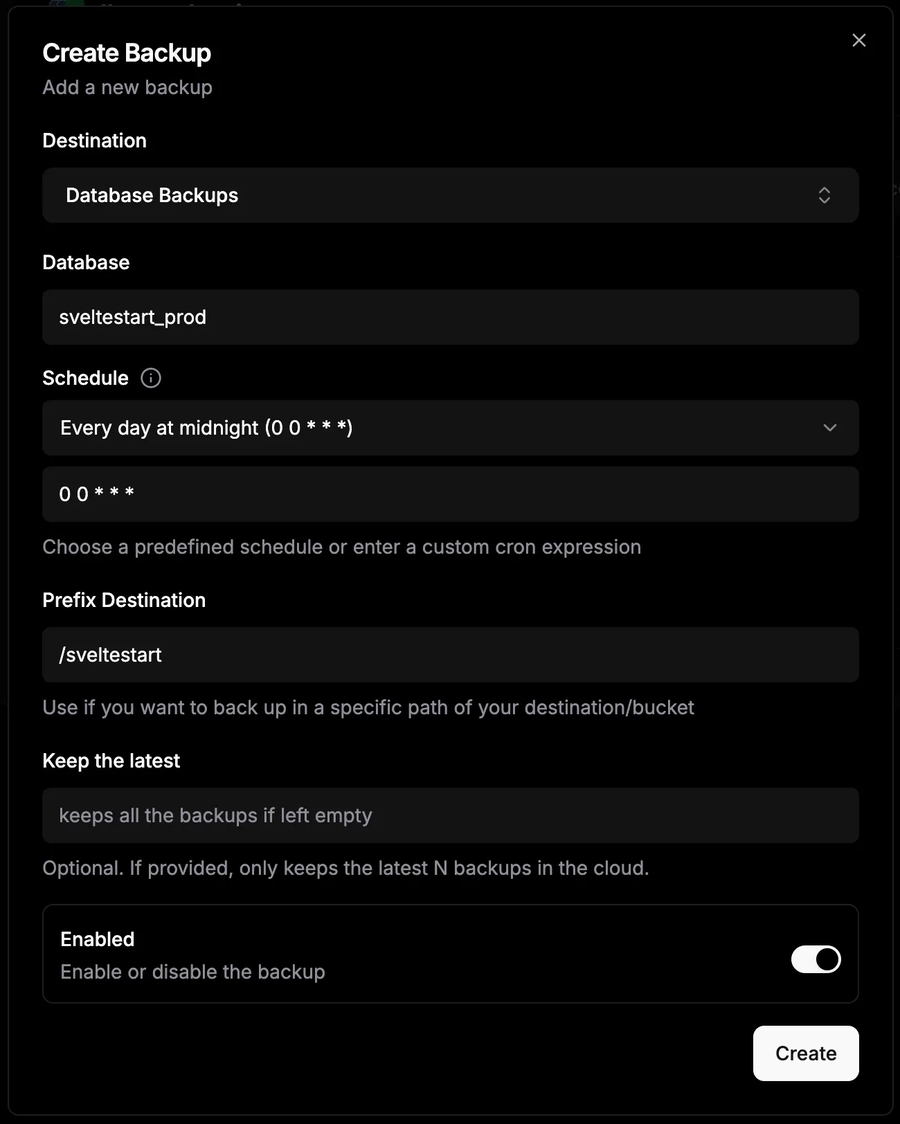
Now we need to set this as the destination for our database backups. Go to the project for your database and then to the 'Backups' tab. Click 'Create Backup', and set the destination to the bucket that you just added to Dokploy. Make sure you specify your app name in the 'Prefix Destination' field so that your database backups will be organised into folders by app name. As a result, you can use this bucket for all your apps. You can also specify the schedule for how often to backup.
After creating this automation, you can test it immediately by clicking the play button to run a manual backup and check that it appears in the bucket via your cloud storage provider's UI.
Last updated